예제 코드
import 'package:flutter/material.dart';

void main() => runApp(const MyApp());

class MyApp extends StatelessWidget {
  const MyApp({Key? key}) : super(key: key);

  static const String _title = 'Flutter Code Sample';

  @override
  Widget build(BuildContext context) {
    return const MaterialApp(
      title: _title,
      home: MyStatefulWidget(),
    );
  }
}

class MyStatefulWidget extends StatefulWidget {
  const MyStatefulWidget({Key? key}) : super(key: key);

  @override
  State<MyStatefulWidget> createState() => _MyStatefulWidgetState();
}

class _MyStatefulWidgetState extends State<MyStatefulWidget> {
  int _count = 0;

  @override
  Widget build(BuildContext context) {
    return Scaffold(
      appBar: AppBar(
        title: const Text('Sample Code'),
      ),
      body: Center(child: Text('You have pressed the button $_count times.')),
      floatingActionButton: FloatingActionButton(
        onPressed: () => setState(() => _count++),
        tooltip: 'Increment Counter',
        child: const Icon(Icons.add),
      ),
    );
  }
}
여기 class MyApp extends StatelessWidget 이렇게 StatelessWidget을 상속 받아 쓰이는 이유는 말그대로 상태가 없어도 되는 위젯이기 때문이다. 여기 나와있는 const MyApp({Key? key}) : super(key: key); 는 무슨 의미인 지 모르겠다. StatelessWidget의 key값을 MyApp에서 받아 MyApp 생성자를 구성한다. ~라고 이해하고 있다.
이 MyApp에서의 중요한 로직은 여기서 발동된다.
@override
  Widget build(BuildContext context) {
    return const MaterialApp(
      title: _title,
      home: MyStatefulWidget(),
    );
  }
여기서 _title은 static const String _title = 'Flutter Code Sample'; 여기서 선언한 값이 들어갈 것이고,
버튼에 따라 상태가 변하며 response를 보여주는 Stateful한 로직은 home: MyStatefulWidget(), 에서 발동된다.
이제 MyStatefulWidget() 으로 들어가보자.
class MyStatefulWidget extends StatefulWidget {
  const MyStatefulWidget({Key? key}) : super(key: key);

  @override
  State<MyStatefulWidget> createState() => _MyStatefulWidgetState();
}
여기서도 StatefulWidget의 key를 받아 MyStatefulWidget이라는 생성자를 구성한다. 그리고 여기서도 override를 통해 _MyStatefulWidgetState() 를 발동시킨다.
왜 여러번 번거롭게 class가 class를 발동시키고 또 class가 있는 지 아직 이해를 못하겠다. 하지만, flutter의 구조를 알지 못해서 그럴 것이고 다 이유가 있을 것이다.
자 이제 발동시킨 로직이 들어있는 _MyStatefulWidgetState() 에 들어가보자.
class _MyStatefulWidgetState extends State<MyStatefulWidget> {
  int _count = 0;

  @override
  Widget build(BuildContext context) {
    return Scaffold(
      appBar: AppBar(
        title: const Text('Sample Code'),
      ),
      body: Center(child: Text('You have pressed the button $_count times.')),
      floatingActionButton: FloatingActionButton(
        onPressed: () => setState(() => _count++),
        tooltip: 'Increment Counter',
        child: const Icon(Icons.add),
      ),
    );
  }
}
드디어 내가 궁금했던 Scaffold keyword를 만났다. Scaffold는 기본 Material Design visual layout 구조를 구현하는 데 사용된다. Scaffold의 생성자 파라미터에 있는 appBar, body, floatingActionButton widget 들이 정의된 모습을 볼 수 있다. 이 부분을 공부할 때 여기를 참고했다
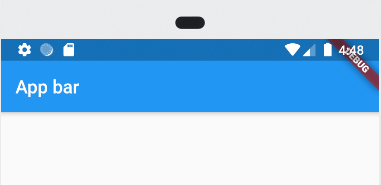
- appBar는 AppBar widget의 instance이며 Application 최상단에 위치한 bar를 가리킨다.

- body는 AppBar의 밑영역을 의미한다.
- floating action button은 원형 아이콘으로 일반적으로는 화면 아래 오른쪽에 위치하고 위치 변경 가능하다. FAB이라고 부르기도 한다.
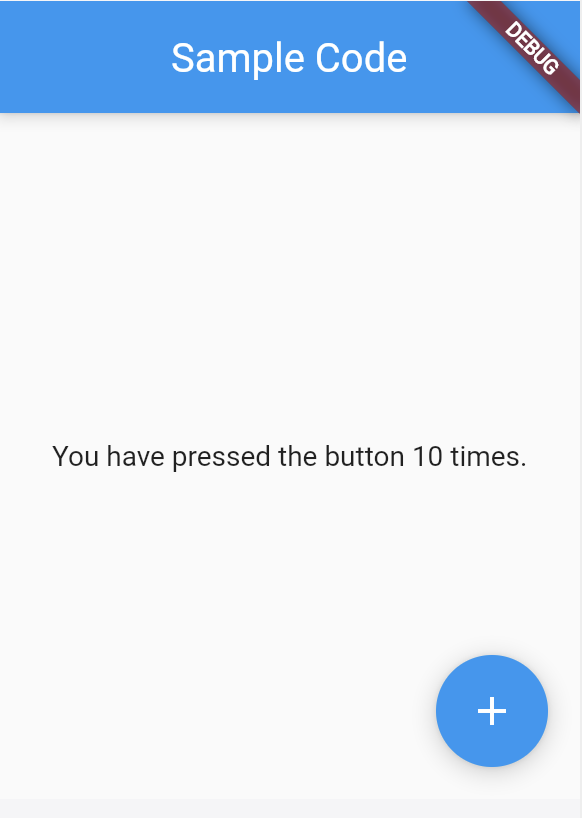
이 코드의 결과는 다음과 같다.

10번 눌렀고 10번 이라고 나온다.
지금까지 공부한 바로는 Scaffold가 그냥 내가 만들 앱의 판을 깔아주는 클래스에 불과한 것같다.
Scaffold의 사전적의미는 발판이다.
예제 코드 2번
위의 예제 코드 1번에서 Scaffold 파라미터에 backgroundColor만 추가했다.
@override
  Widget build(BuildContext context) {
    return Scaffold(
      appBar: AppBar(
        title: const Text('Sample Code'),
      ),
      body: Center(child: Text('You have pressed the button $_count times.')),
      backgroundColor: Colors.blueGrey.shade200,
      floatingActionButton: FloatingActionButton(
        onPressed: () => setState(() => _count++),
        tooltip: 'Increment Counter',
        child: const Icon(Icons.add),
      ),
    );
  }
결과는 다음과 같이 배경색이 회색으로 나온다.

예제 코드 3번
예제 코드 1번에서 Scaffold 파라미터에 bottomNavigationBar, floatingActionButtonLocation 추가 되었다.
@override
  Widget build(BuildContext context) {
    return Scaffold(
      appBar: AppBar(
        title: const Text('Sample Code'),
      ),
      body: Center(
        child: Text('You have pressed the button $_count times.'),
      ),
      bottomNavigationBar: BottomAppBar(
        shape: const CircularNotchedRectangle(),
        child: Container(height: 50.0),
      ),
      floatingActionButton: FloatingActionButton(
        onPressed: () => setState(() {
          _count++;
        }),
        tooltip: 'Increment Counter',
        child: const Icon(Icons.add),
      ),
      floatingActionButtonLocation: FloatingActionButtonLocation.centerDocked,
    );
  }
bottomNavigationBar는 그렇다쳐도, floatingActionButtonLocation이 floatingActionButton 내부가 아닌 밖에서 Scaffold의 파라미터로 들어간 점이 의외다. FAB의 위치를 정해주는 코드가 충분히 floatingActionButton의 파라미터로 들어가도 될 것같은 데, 밖에 따로 Scaffold의 파라미터가 되어야한 다는 점이 정말 의외다.
결과는 다음과 같다.

예제 1, 2, 3을 통해 Scaffold는 화면을 보여줄 기기에 우리가 구현할 것들을 화면 크기에 꽉채워서 판을 깔아주는 존재라는 것을 알게되었다. 각각의 기기들의 화면의 크기가 다를 테지만, Scaffold의 조상 클래스인 MediaQuery에서 기기의 여러가지 시스템 정보를 갖고 있다.
대표적으로 MediaQuery는 화면 크기를 가져올 때 사용된다.